
IKEA Hack – Lack Table Transforms to DIY Bench
Hello again my Friends, it’s another crazy week around my home. I’ve decided to create an EBook on “Designer Inspired Home Decor on a Budget” (or something like this), but underestimated how much work goes into doing so. Story of my life. You know you’re a creative when you have a million + 1 ideas but absolutely NO CLARITY on how to get there. I trust that my sweet Jesus is working on me though.
Ok ok, enough of my babble and onto the post.
I created this bench about 6mos ago in a video tutorial. To date, it is one of my most successful posts on YouTube. But then, I was looking through my blog posts and realized I’ve never shared it here. Like, why!?🤔 Needless to say, today is the day. So let’s get started.
DURATION: 10-24hrs | MY COST: apprx. $100 | DIFFICULTY: Intermediate/Advanced
“MY COST” may or may not reflect the cost of items that I already own, but I will try to list each item as well as suggestions as to where to purchase them. Items that I had to purchase for the project will be bold with a price. If you have any questions about an item, please leave a comment below.
SUPPLIES:
- VIEW ALL AMAZON ITEMS HERE – Amazon Store – IKEA Hack Lack Table
- 2 Lack Table – IKEA
- Dowel 36×1/4in – Home Depot
- 2 Craft Plywood Sheet 12x24x1/8 – Joann Fabric or Amazon
- Paint – Home Depot
- Oriented Strand (particle) Board 4x8x7/16 – Home Depot
- 2yrds of foam 2″ – Joann Fabric or Amazon
- Dacron Batting – Joann Fabric or Amazon
- Button Kit | around $4.00 – Joann Fabric or Amazon
- Hemp String – Walmart
- 3 packs of Decorative Studs(Furniture Nails) – Home Depot
- One Panel Drape 84″ – Target
- Jig Saw – Home Depot
- Table Saw – Home Depot
- Drill – Home Depot
- 1/4″ Spade Bit – Home Depot
- Nail Gun – Home Depot
- Staple Gun – Home Depot
- Medium Needle with Large eye – Amazon
- Barbecue Skewer or long needle – See above item
- Wood Filler – Home Depot
- Wood Glue – Home Depot
- Spray Adhesive – Amazon
- Utility Knife – Home Depot
- Marker & Pencil
- Scissors
- Download the template at https://angelaeast.com/download/lack-table-template-ikea-hack/
So now that we have our supplies, let’s get started…

I had this perfect view in my master bedroom, but it could never be enjoyed…

…because the area underneath the windows was being used as clutter storage 🙈. I cleaned up and started on a project that would allow me to enjoy the space. CLUTTER BE GONE!!

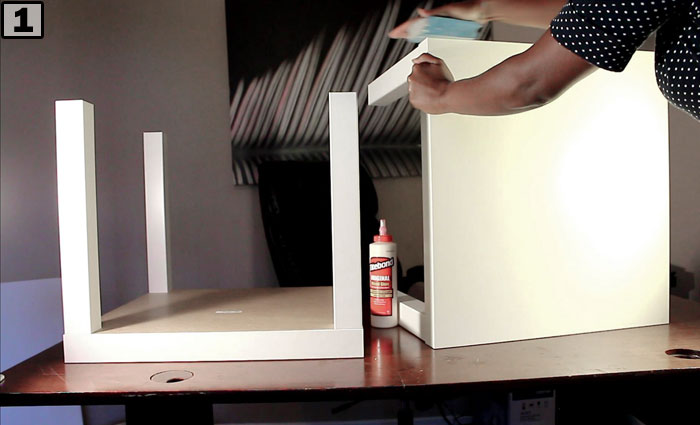
I used two IKEA Lack table shown here.

Once assembled, I fit it in place just for a visual.

To create the decorative legs, I drew the above template onto foam board. Get the template below.
Download this hand drawn template for FREE by signing up here:
Next,

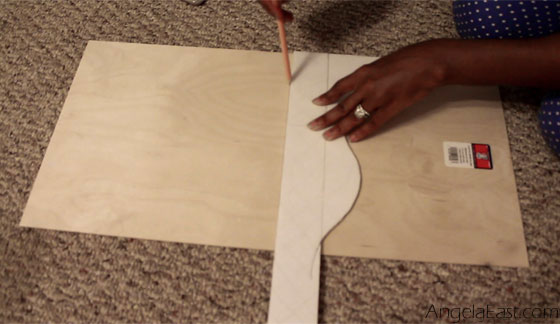
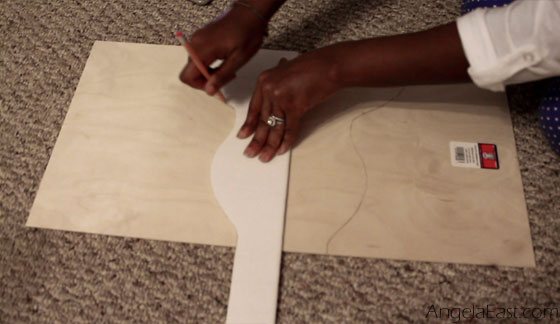
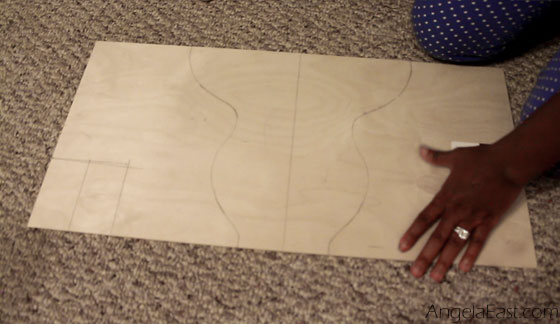
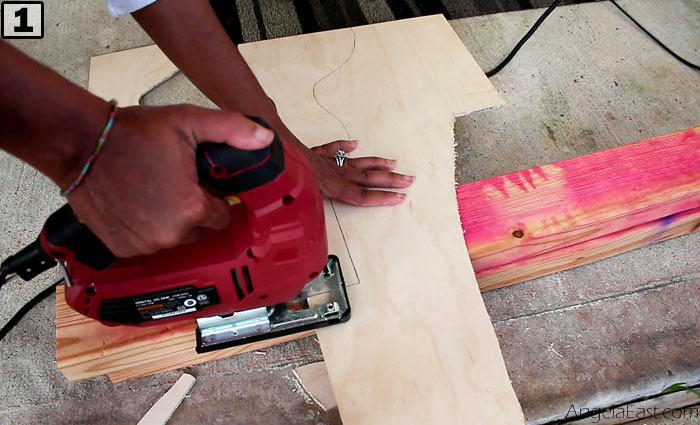
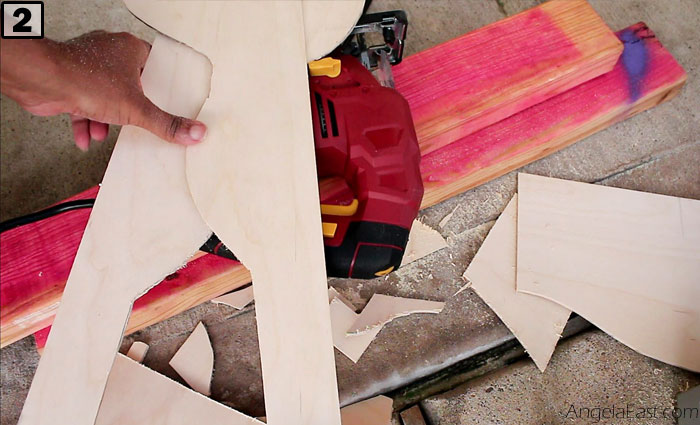
I traced two of these patterns onto my plywood sheet. I needed two for the two outside table legs. I traced them both onto one piece of plywood sheet by flipping the template vertically and tracing again.


In the images above, I’m creating the piece that will lay on top of the middle two legs. I traced the template once, then flipped it horizontally and traced again. Unfortunately, this piece is larger than the plywood sheet I had, so I traced the bottom portion on the side. I will seam the two pieces later.


Now, let’s move on to the table.


Once the glue was dry and the tables were fused into a bench, I laid it top down onto particle board and traced.

Then I cut out the shape. This piece will be used for the cushion top of the bench. Note: You can purchase and have wood cut for free at Home Depot. I think I just wanted a reason to use my power tools 😜.

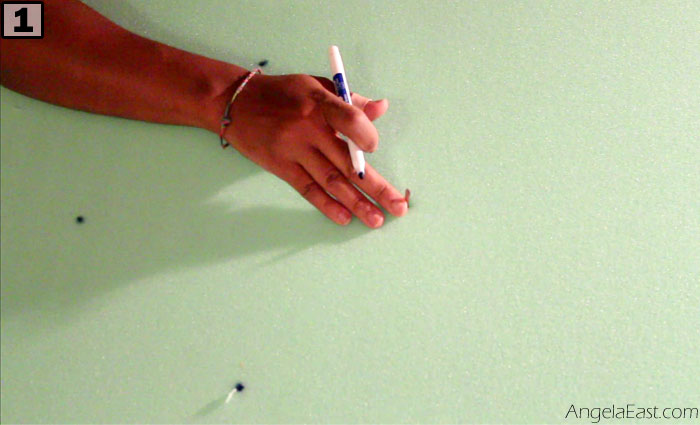
This part was sort of difficult for me. The tables were an awkward size, so my button spacing was kind of weird as a result. So here it goes! There are 3 rows and 4 columns of buttons for a total of 11 buttons.
- I measured 5 5/16 from the top and made a mark on my board. Then I lined my straight edge over the mark horizontally (end to end) and drew a line across the board.
- I did the same thing from the bottom of the board. For a total of 2 horizontal lines.
- From one end, I measured over 5 1/8 and made a mark on my board. Then I lined my straight edge over the mark vertically (top to bottom) and drew a line down the board.
- I moved the straight edge over 5 1/8 and continued to draw lines until I reached the other end. For a total of 4 vertical lines.
- Next I drew a diagonal through all of my line intersections. You need to do run your lines both 45 degrees and 135 degrees.
- Lastly, I took my mark dots everywhere the lines intersected.
See the animated diagram below:


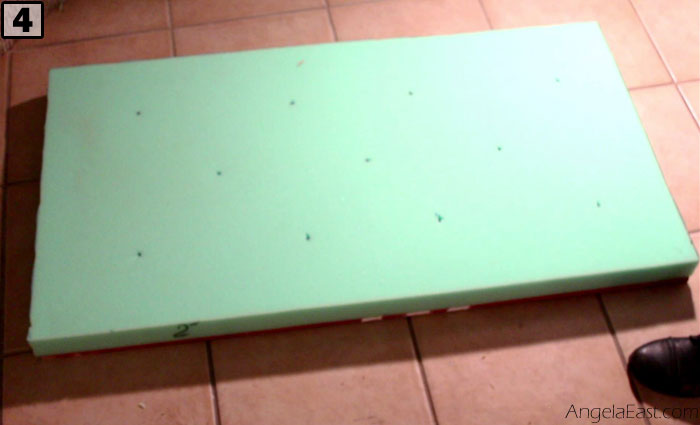
Here’s how my wood board looked.

Next, I drilled holes through each dot. These holes are where you will thread your buttons for the tufting.

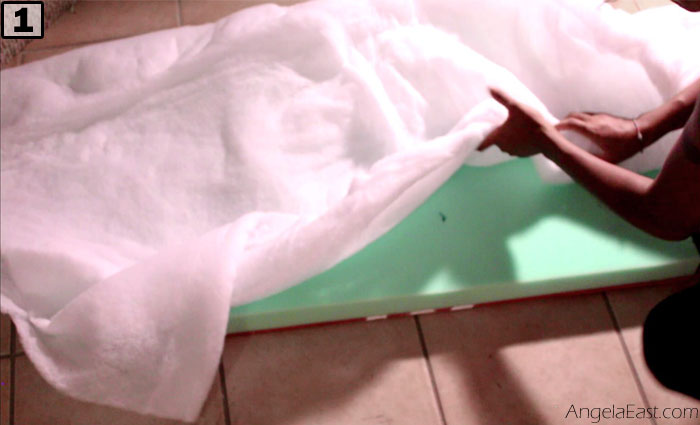
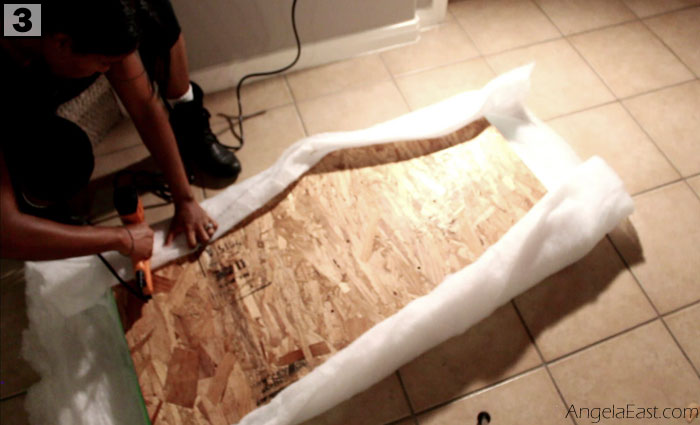
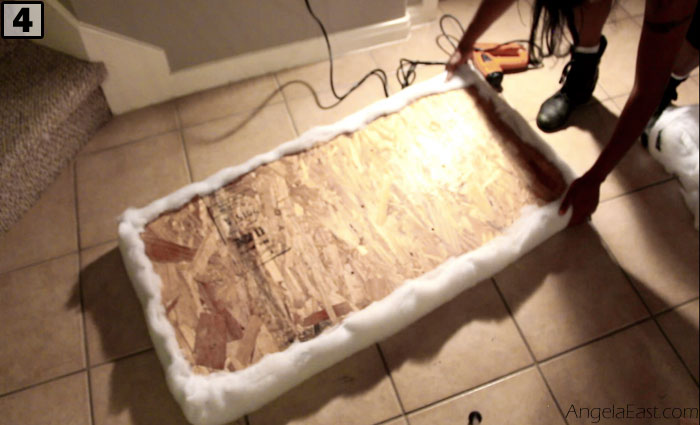
I laid the board on top of my 2″ foam and trace around it with a marker.

Then, cut away the excess foam. And with spray adhesive, attached the foam to the particle board.


With scissors, I cut holes through the batting to expose the holes in the foam. I also decided to make my foam holes a little bigger so that the button will recess easily.

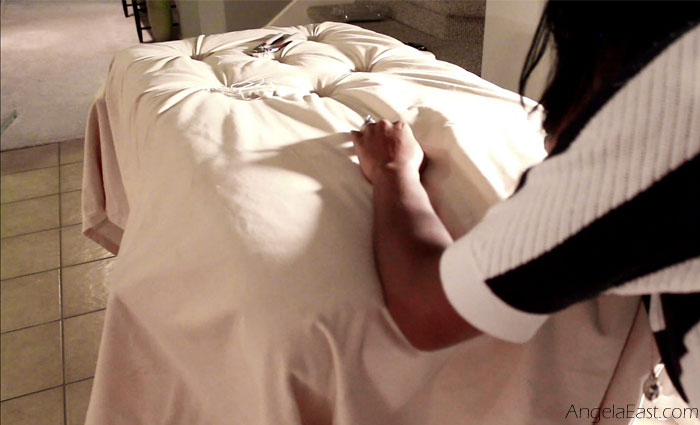
I covered the foam, batting, and board with my fabric. I chose to use a velvet curtains from Target.

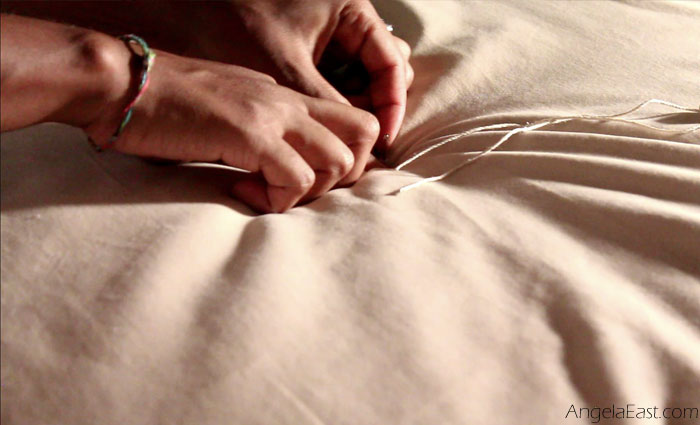
I used a piece of scrap fabric and follow the instructions on the button kit to make the button.

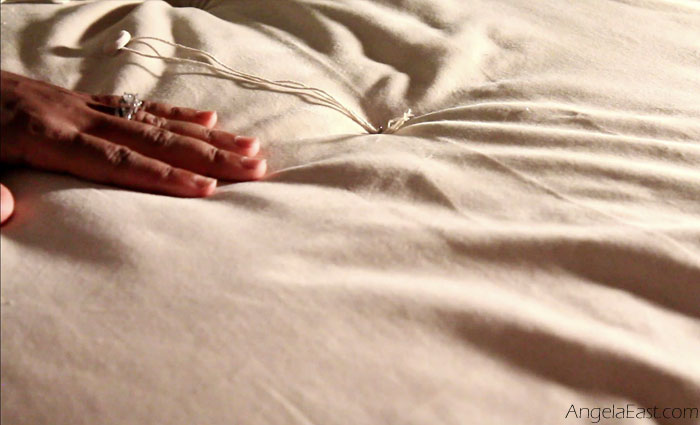
Threaded each button with hemp string. And made sure it was long enough to go through the cushion and board. Here are the buttons I made. Aren’t they cute? 😊

Everything I’ve read said you should start your tufting from the middle of the piece you are working on, then work your way out from there pulling and smoothing as you go along. This ensure the fabric is pulled in the right direction and the tufting is uniform.


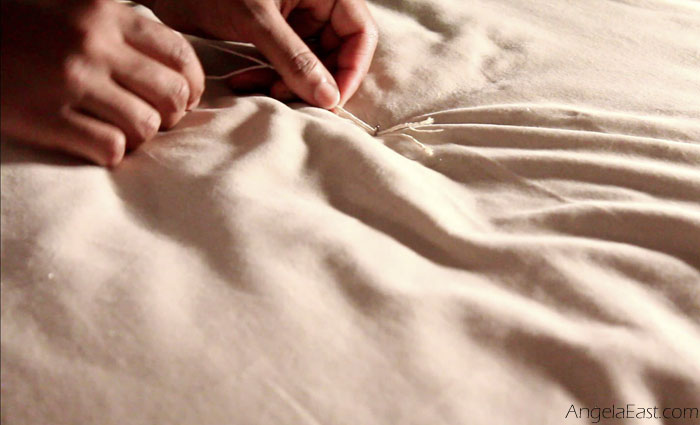
Underneath the board, I’m pushing my un-threaded needle, eye first, through one of the drilled holes. Making sure I can still grip the needle from the bottom. When needle poked through the top, I threaded it with a button placing both ends of the hemp string through the eye of the needle. Then, I pulled the threaded needle back down from the bottom.


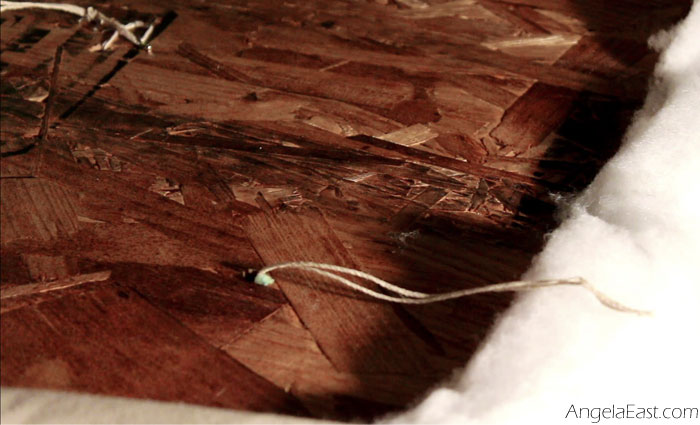
Here is the view from the bottom. I pulled the string tautly so that it made a dimple on the top . Then stapled the string to the board at least 3 times in different directions or until it was secured.

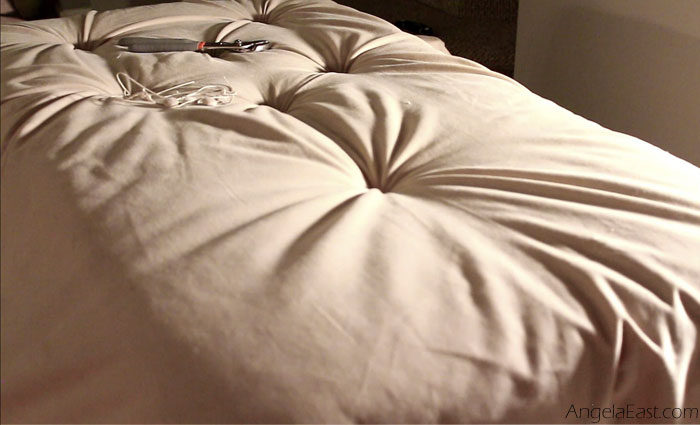
Done with tufting. YAY!!

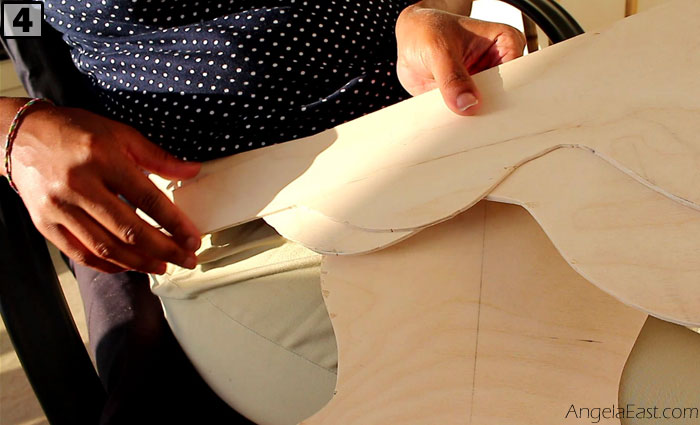
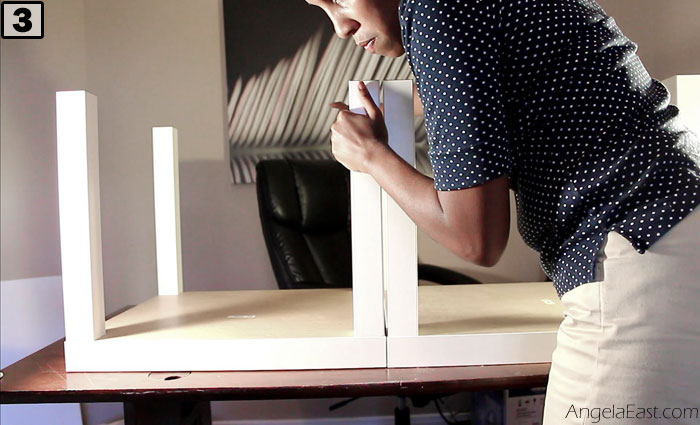
Ok, so I realized that I needed something for the decorative curved pieces to rest on. Total after thought!! But I easily resolved this by cutting a dowel into four small pieces and gluing it underneath the table against each leg.

Then I glued on my decorative pieces. It’s looking cool already. I also made the decision to cover the two legs in the back by cutting a single piece of my plywood board. You’ll see how this looks in the next picture.

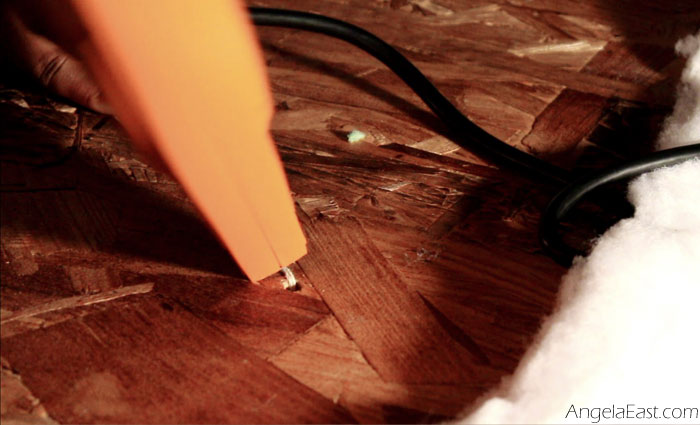
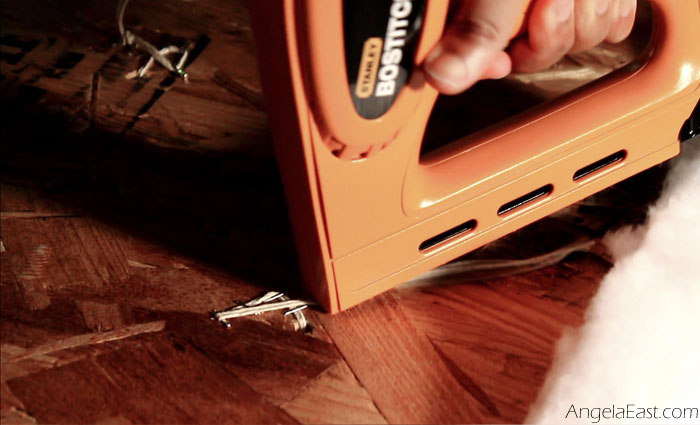
Just for some added security, I’m nailing the curved pieces to the legs. I’m sure the glue was enough, but I wanted to be secure. I also made sure to nail the curved pieces to the dowels as well.

I filled any and all holes, included gaps and holes creating from the nails, with wood filler. And allowed to dry.

Once dry, I sanded the entire surface smoothing out all of the wood filler. I’m using 120 grit paper.

This is the paint that was purchased for the project. It wasn’t dark enough so I mixed in a little black paint.

I used 2 coats of paint.

Here is my table completely dry and ready for it’s top. Using a few coats of polyurethane would have given it a more glossy finish. ButI was fine with this.

I set my tufted top right on top of the tables.

and cut off the excess fabric.

I wanted a way to secure the top to the table, so I lifted the fabric and nailed around the edges of the board.

Now, I’m adding batting along the edge of the table.

Now, I’m pulling the fabric tautly and stapling it down around the legs.

The fabric that is left over the legs, I tucked inside…

then staple it down over the legs. **It was suggested by a YouTube follow that I could have stapled all of the fabric underneath the table and install the legs on top. Excellent idea. Will definitely use that tip next time.**

I do the same thing on the top portion of the two end legs.

To finish of the end leg, I folded the fabric back, sort of like an envelope, and stapled underneath the table.

Finally, the finishing touches. I chose to only do studs around the legs to save on cost. But you can definitely run this around the complete bench.

This is how it turned out. Although it looks fine, it’s not as straight as it could have been. If I were to do this again, I would draw a straight line on the fabric first, then nail my studs along that line.

Here is a full look of the finish project. I am so pleased with how it turned out.
And for the final look. Enjoy pictures of the finish project with pillows. My white pillows were custom made, the blue are from Home Goods.


Now, I can…

…enjoy this lovely view.

Whew! This was a process, but well worth it. I’m enjoying the seating this allows me under my window and am happy to share it with my friends. If you made it through to the end, I truly hope you enjoyed this post. If so, I hope you will share this with your friends. Until next time, take care.


Guess what!? I’ve created a YouTube video for this post. If you have time, check it out. While you’re there subscribe, because I’d love to have you?
![]()

35 Comments. Leave new
Okay 3 things: 1) This is fab 2) I’m impressed with your post and break down-go girl! 3) I’m super jealous of your table saw!!!
LOVE how this came out! The tufting looks beautiful Angela! Thanks for sharing!
Thank you so much Carli. I hope you and your family have a wonderful Easter!! :*
This is such a good idea, and the end product is gorgeous! Love!
Hi Laura. Thanks for stopping by and sprinkling love here. I’m so glad you liked the outcome. Hope you have a blessed day.
What an awesome DIY hack! Talk about changing a look! Great job 🙂
Aww thank you for the kind words and stopping by to sprinkle some love. 🤗🤗
I’m addicted to ikea hacks since I just moved last month to a new apartment 🙂
Aren’t they fun?!! I love them too. Sometimes I just walk around the store looking for items I can hack. 😂
This is such a good idea! Totally need to pin this post for my next apartment!
Thank you. I’m so glad you liked it 😊
So envious of your skill!!! Love this tutorial and thank you for really breaking it down step by step. Particularly love the decorative legs.
Aww shucks 🙃. I’m so glad you enjoyed the step by step. Those legs are special 😉
This is a great hack! It’s amazing how you can pimp something as plain as an Ikea side table! Very well done!
Lol!!!! Pimping IKEA items is the life.
Thank you
WOW! I just recently found you on instagram and I am in love! Your posts and designs are amazing! This is such a great hack!
Hey Brigette, Thanks for the comment. I’m so glad you liked it. I’ve followed you on IG as well.
That is such a great idea and turns out really great!
Thanks Marina. I hope you have a wonderful weekend.
Hey! Great Post 🙂 This is brilliant! I love these little hacks, I actually bought two of these tables recently and would have never thought to do this!
I know!!! I’m the same way when I run across different IKEA hacks. Like, I have that same piece who would have thought! I’m glad you liked it. Have a good weekend.
This turned out so cute! I love that tufted look, and probably would have driven myself mad trying to figure out how to make it work. Such a great DIY project. I really loved the step by step aspect of it! I already have a couple of these little tables, and while I normally can’t do these wood cutting projects in my little apartment, I could certainly bring the cut wood home from Home Depot and give it a shot!
Hey Beth. Yes Home Depot is definitely an option. Plus it’s free. Thanks for leaving a comment. Have a blessed weekend.
Ooo! I would have never thought about doing this! This hack is so cute too, I really love the legs! Definitely want to do this! 🙂
xo, Chloe // http://funinthecloset.com/witch-favorite-color/
How cool! And such a cute use of a small space
Thanks Jean!! So glad you approve my friend. I’m thinking about trying out some different ways of styling this thing. Check back in the near future for the updates.
This bench came out great!! What an awesome project!
Hey Emily. Thank you so much. This was truly a labor of love. I’m happy it came out as well as it did. I appreciate the love girl 🙂
This is amazing!! What a fantastic way to re-purpose coffee tables! I had a lack table years ago and we just threw it out when we got a new one, now I wish we’d kept it so I could turn it into a bench!
Awww. There are soo many different things you can do with these little tables. Maybe you’ll try something when your current one gets old.
I love this idea! What a fun way to update your home!
Hey Allison. I’m glad you like it. Thanks for stopping by. 🙂
This is a great post. We are moving in to a larger house soon, so I can’t wait to explore your web site for other goodies. I love seeing a woman with power tools, it’s so empowering!!!!
Hey Stephanie!! Thank you so much. I am the same way. When I see a woman whip out a power tool, I can’t help but stick around and watch what magic comes. LOL. I hope you have a goood day 🙂
[…] Ikea Lack To DIY Bench from angelaeast.com […]